
This article walks a new Admin through setting up HOA Start Classic to send dues invoices, in order: connect Stripe, decide whether to use Households, add members, create households (if you use them), and create a Dues Tier. The Admin account created at sign-up can complete every step, including connecting Stripe.
An organization must connect Stripe before it can create dues or collect online payments.
Step 1: Connect Stripe
Stripe is the payment processor. It is pay-as-you-go with flat-rate transaction fees and no monthly or annual fee. Before you start, gather the organization’s EIN, bank account number, and ABA routing number. The person who completes setup should be authorized to sign on the organization’s behalf.
- Click Account in the left menu, then click Settings.
- In the Online Payments section, click Stripe Setup. Stripe’s website opens.
- Complete the Stripe steps: create and secure the account, enter the organization’s information (the legal name and EIN must match IRS documents exactly), verify the authorized person’s identity, enter the bank routing and account numbers, set the statement descriptor, and review and submit.
- When Stripe returns you to the Settings page, wait for the Stripe Customer ID to appear. This can take up to an hour.
- Turn on Enable Credit Card Payments, and turn on Enable ACH Payments to let members pay from their bank accounts.
Approval is usually almost immediate, and Stripe sends an email confirmation within the hour.
For more detail, see How Do I Set Up Stripe Connect? and What do I need to do and what does it cost to set up Stripe?.
Step 2: Decide Whether to Use Households
A Household groups the members who share one address, such as an owner and a co-owner, under one record. Classic bills and counts votes per member by default. The Households feature changes that to one invoice and one vote per address.
Use Households if any of these is true:
- Everyone in the community, including multiple owners of one property, has their own login, and you invoice dues and accept online payment. Household billing lets the system recognize that a property’s dues are already paid and reject duplicate payments.
- Online votes and surveys must accept one vote per property.
- You bill different amounts to different groups of owners, or only some households receive invoices (voluntary-membership communities). This uses Household Labels.
- Renters, contractors, or property managers need different billing or voting rights than owners.
If none of these applies, skip Households and bill members directly. Households is only needed if you plan to invoice dues or hold votes online and want to limit them to one per address. Households and Addresses are managed from the Households tab in the left menu.
To turn on Households:
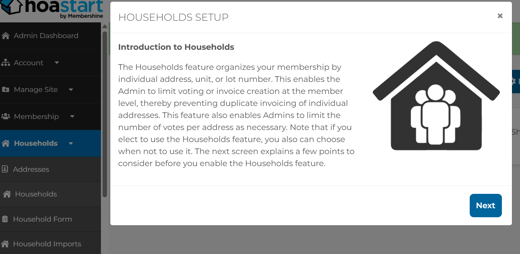
- Click Households in the left menu. The first time you open it, the Households Setup window appears. Read the Introduction to Households, then click Next.
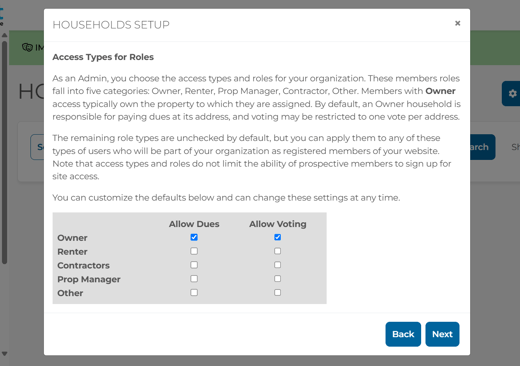
- On Access Types for Roles, choose which Household Access Types are allowed to receive dues and to vote by checking Allow Dues and Allow Voting. Owner is checked for both by default. Renter, Contractors, Prop Manager, and Other are unchecked by default. You can change these settings at any time. Click Next.
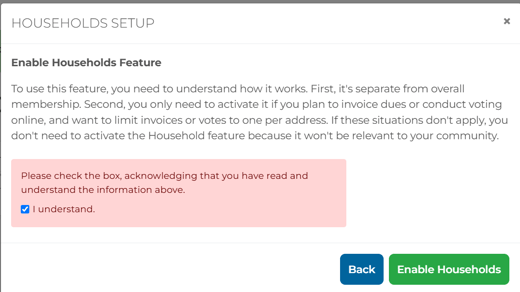
- On Enable Households Feature, check I understand in the red box. Enable Households turns the feature on, so click it after you have checked the box.
Access types and roles do not limit who can sign up for site access.
For more detail, see How do I know if I need to use households? and An Overview of the Households Feature.
Step 3: Add Members
Members come first. Every household member must already exist as a member, and each member needs a unique email address.
To add one member:
- Click Membership in the left menu, then click Members.
- Click Members Actions, then click +Add New Member.
- Enter First Name, Last Name, Email Address, Country, Address Line 1, City, State, and ZIP. Phone Number, Address Line 2, and Lot Number are optional.
- To send the login email right away, check Email this Member to set password.
- Click Save.
A member added this way is active immediately and does not go through the Member Approval queue.
To add many members at once, import a CSV file:
- On the Members tab, click Members Actions, then click Member Import.
- Click +Import Members, then click Download Import Template.
- Fill in the template and save it as a CSV. Do not rename, delete, or reorder columns, even empty ones. Required columns are Email Address, First Name, Last Name, Country, Address Line 1, City, State, and ZIP.
- Upload the file, click View Summary, and review the New Members, Updated Members, and Failed Rows tabs.
- Click Import.
To invite members who have never logged in, such as members you just imported, filter the Members list with Filter To Never Logged In, click Members Actions, click Message Filtered Members, turn on Send a System Email, and check Reset Password. Set-password links expire after 7 days.
For more detail, see Enter Member Data Manually, How do I import members and households?, and How do I send password reset links to members who haven’t logged in?.
Step 4: Create Households
Only if you chose Households in Step 2. Communities that bill members directly skip this step.
Households must be enabled first (Step 2). Each Household has a Title, a Household Access Type, an Address, and one or more members. Access Types are Owner, Renter, Contractors, Prop Manager, and Other. By default, only Owner households are allowed dues and voting; the settings chosen in Households Setup control this. Only people with the same Access Type can share a Household, so a property with an owner and a renter needs two Households.
To create one household:
- Click Households in the left menu, then click the Households tab.
- Click Households Actions, then click New Household.
- Enter a Title. Use a consistent formula, such as the street address plus the access type (123-Any-Street-Owner).
- Choose the Household Access Type.
- Choose the Address. If it is not listed, click Add New to create it without leaving the window.
- Select the Household Members.
- Click View Summary, then click Save Household.
To create many households at once, import them after the member import:
- Click Households, then click Household Imports.
- Click Import Actions, then click Import Household Members, and download the template.
- Copy your member data into the template and fill in Household Title and Access Type for every row. Every member of the same household must have the identical Household Title and Access Type, and Address Line 1 must match exactly ("St." and "Street" create two households).
- Upload the file, click Review Import, check the summary, and click Import.
Only the Household Members template is needed unless you use Household Labels or custom Household Form fields. Those also need the Households template, imported first.
For more detail, see Enter Household Data Manually, How do I import members and households?, and Using Household Labels.
Step 5: Create a Dues Tier
Every recurring invoice comes from a Dues Tier. A Dues Tier has four tabs, and all required fields on all four must be complete.
- Click Payments in the left menu, then click Dues & Fees.
- Click Dues Actions, then click +Add New Dues Tier.
- Invoice Details tab: enter the Dues Name and Amount. Under Would you like to activate this Dues Tier?, choose Yes to schedule invoicing, or No to build the item without creating invoices.
- Add Fees tab: choose whether to allow partial payments, pass the transaction fee to the member with Enable Service Fees, and set interest-based or flat late fees with a grace period. Partial payments and late fees cannot both be active.
- Select Frequency tab: choose Annually, Quarterly, Semi-Annually, or Monthly, choose whether it runs from each member’s join date or a set due date, choose the payment Terms, and set End Repeat.
- Configure Invoice tab: choose who is invoiced (see below), and add payment instructions if needed.
- Click Calculate Invoice Schedule to preview the invoice dates and the number of invoices.
- Click Save.
Who is invoiced on the Configure Invoice tab:
- Member Tags: only members with the selected tags are billed.
- Invoice All Members: everyone registered for website access.
- Invoice Individual Members: specific members you pick.
- Invoice All Households (One Payment Per Address): available when Households is on. One invoice per household, and the first household member to pay closes it for the whole household. Households can also be limited by Household Label.
If none of these options is selected, the Dues Tier bills no one.
Timing: An invoice goes out a number of days before it is due, equal to the payment terms. Invoiced members receive the emailed invoice early in the morning on the day after you create the Dues Tier, or on the first day of the item’s term, whichever is later. To test a Dues Tier without invoicing anyone, leave Activate Due and Invoice All Members off.
For more detail, see How do I add a new Dues Tier?.
Step 6: Review Your Invoices
Open Payments > Dues & Fees to see every Dues Tier with its type, amount, frequency, and the number of members who are late. Click View Summary on an item to see its invoices and payment activity. If a Dues Tier invoices the wrong people, open its Summary, open the Invoice Actions menu, and choose Delete Unpaid Invoices.
Members pay from the Member Portal or the mobile app, by card or ACH once those payment methods are enabled in Step 1.
For more detail, see Manage and Track Your Dues Items.
Other Ways to Bill
One-Time Charges collect a payment from anyone, including non-members, with no invoice and no due date. One-off household or member invoices bill a single obligation to a specific member or household, with a due date and optional late fees.
For more detail, see How to choose between one-time charges and one-off member/household invoicing?.